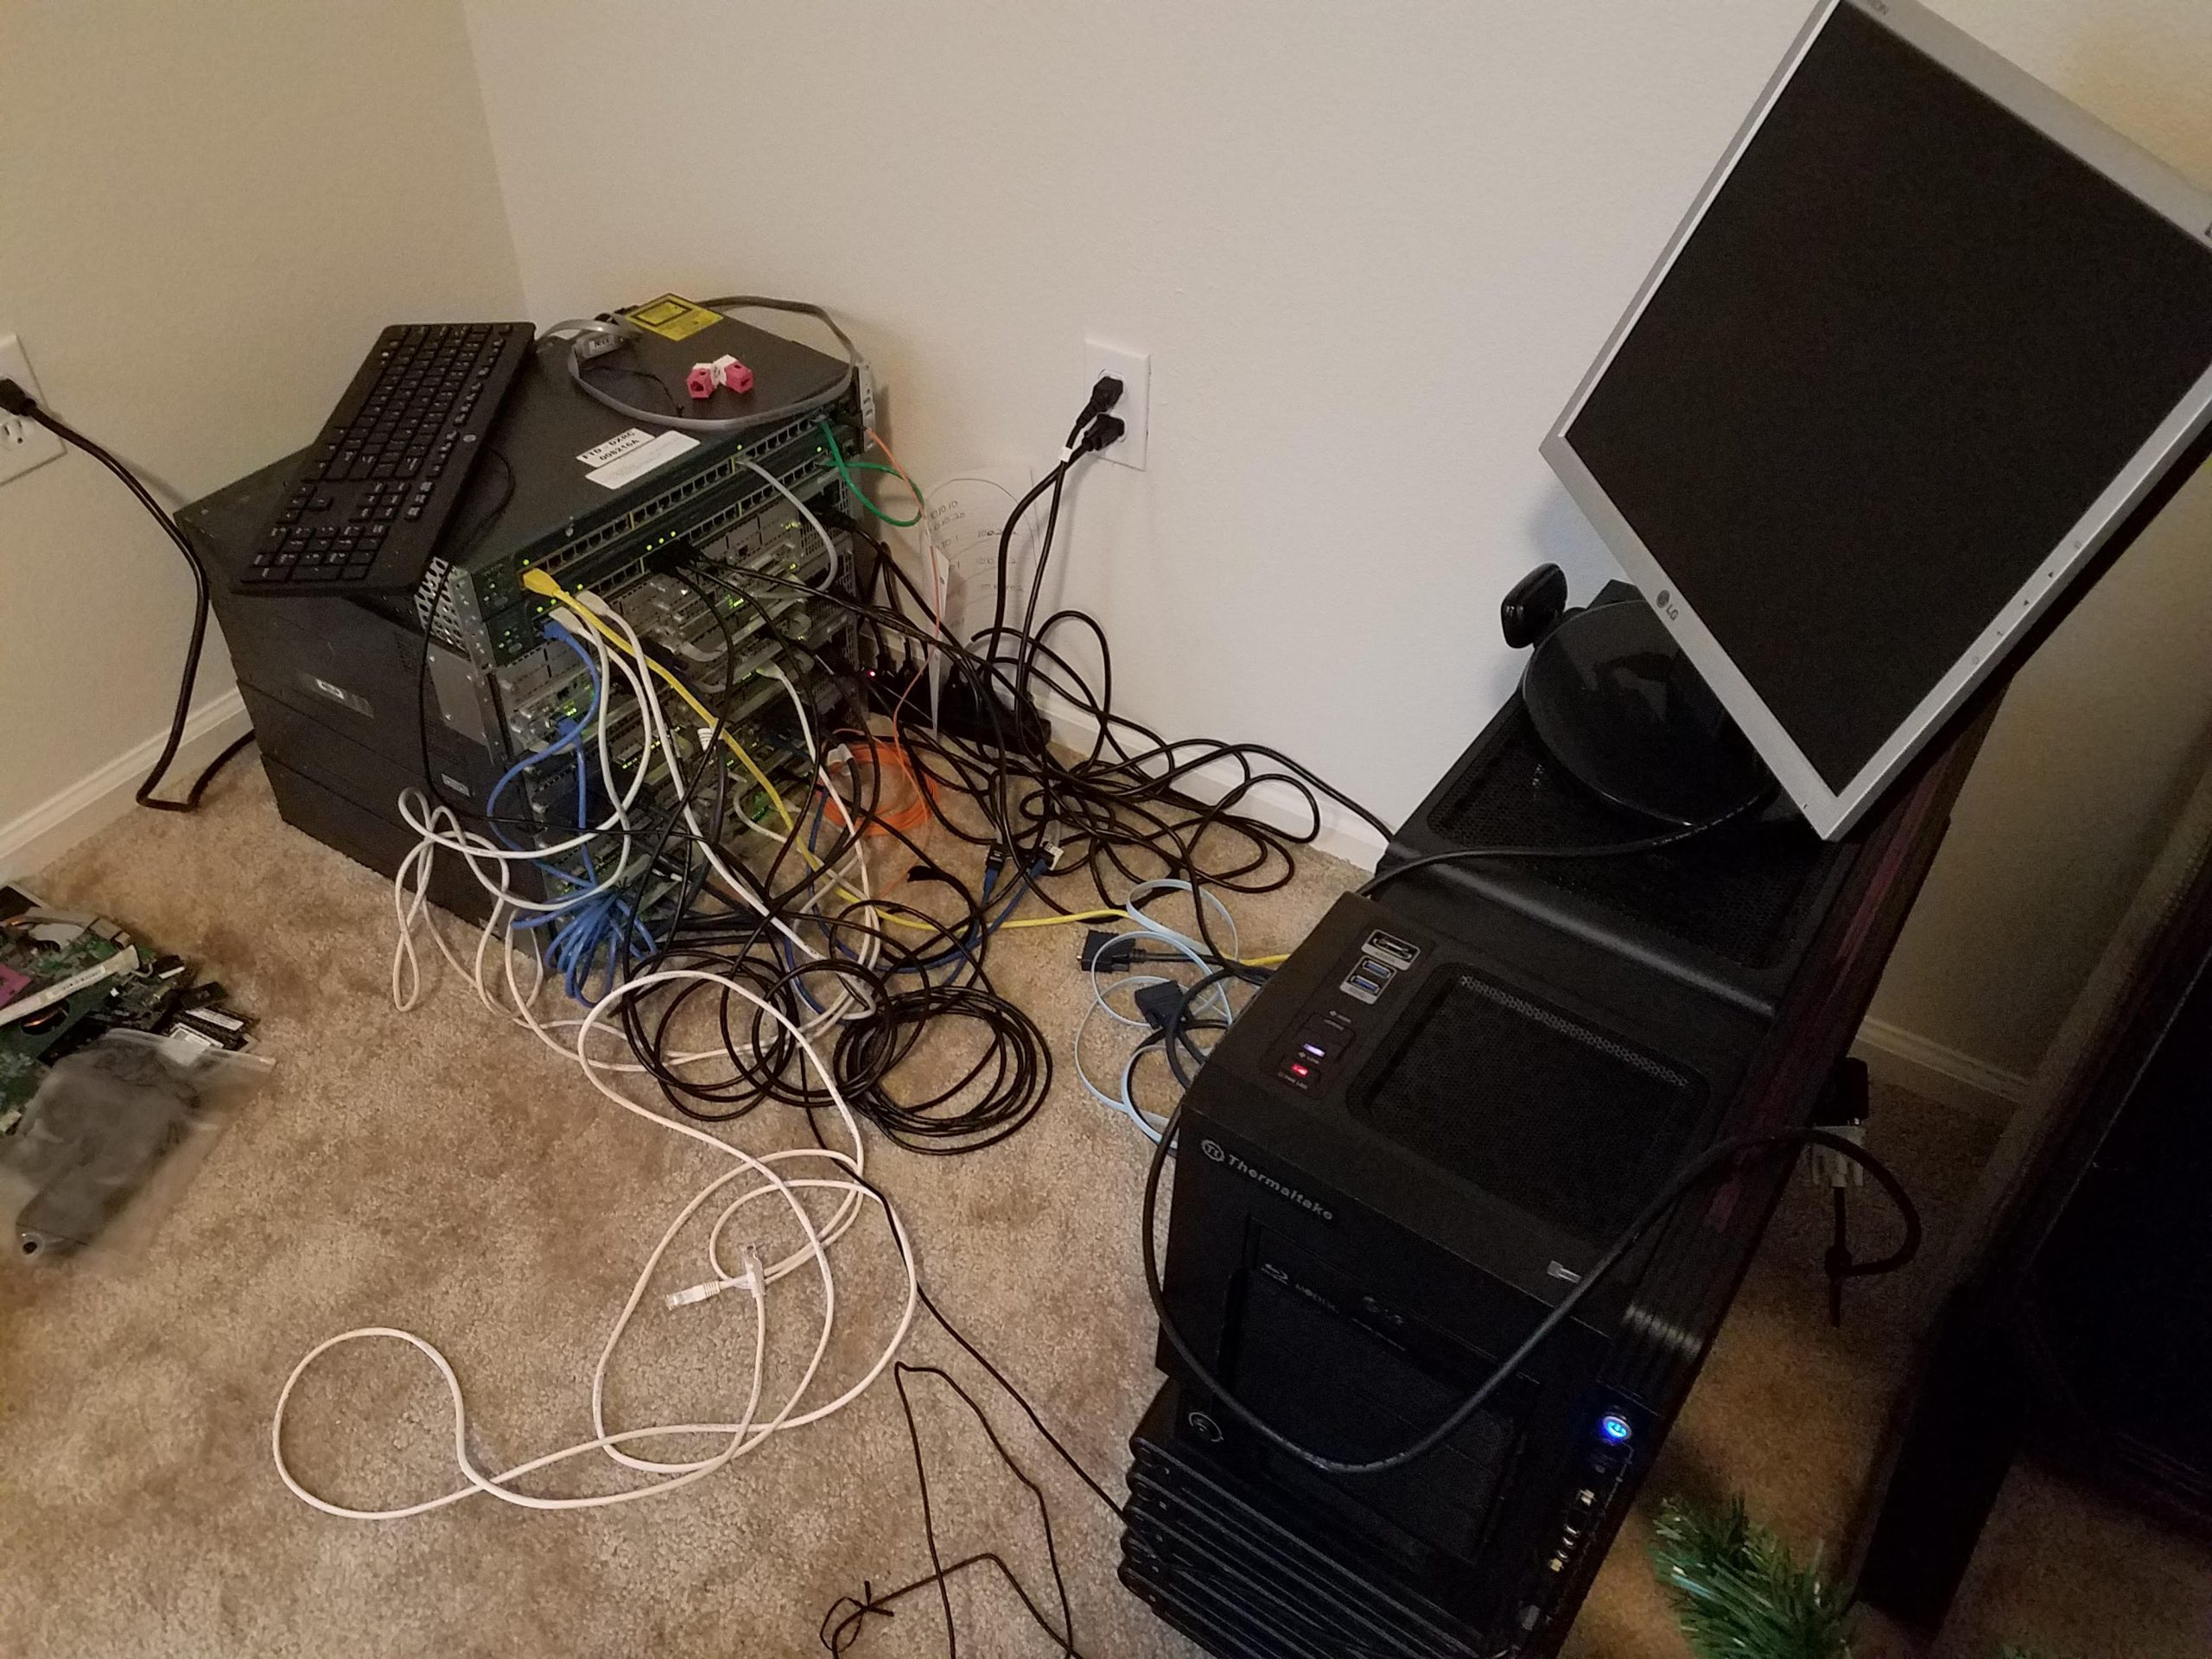
For a while, my homelab looked like exactly what it was: a work in progress. I had the networking equipment and then right next to it was a 4U TrueNAS server and a 4U Proxmox server on the floor just kind of… there… No rack. No rails. Just two chunky machines squatting on the carpet sucking up dust mites while looking completely unbothered by the fact that everything else had a home and they didn’t.
Homelabbing has been less of a hobby and more of a necessity — a hobby out of necessity — where I had a need mixed with fear. I had a need for redundant data storage, while also finding out how to use some old tech instead of just giving it away when I upgraded my home PC. I didn’t want to lose any data during the migration to the new PC, and I didn’t want that data to die because I’m dumb when it comes to authentication and lock myself out or something stupid. So I wanted more options/apps for more options with authentication, security, and redundancy, which led to the homelab.
The second-PC server was nice and all, but it sucked up a lot of power for a gaming PC-turned-server to be running 24/7. So I needed something that did the same thing but on less power and size.
Introducing The 10-Inch Rack
The 10-inch rack was a tidy way to have a stack of mini-PCs in one unit. It’s a great idea for people like me who want redundant servers along with their redundant storage. I loved it. Mainly, I wanted something that could be easily moved, all in one, have all my servers in one place that could also be easily tucked away.
Though, with more and more PCs stacking up in my nerd room with every new upgrade, or friends giving away PCs when they upgrade, and I hoard PC hardware like a squirrel in autumn, I needed something for the PCs too.
So I bought a 28U rack.
And now I can have the PCs stacked, and have the 10in rack on a shelf inside that rack so I ca— Wait what do you mean there’s not a real solution to have the actual 10-in rack inside the 19in rack? I just wanted to have everything in one stack!!! Ok well I had the 28U rack…
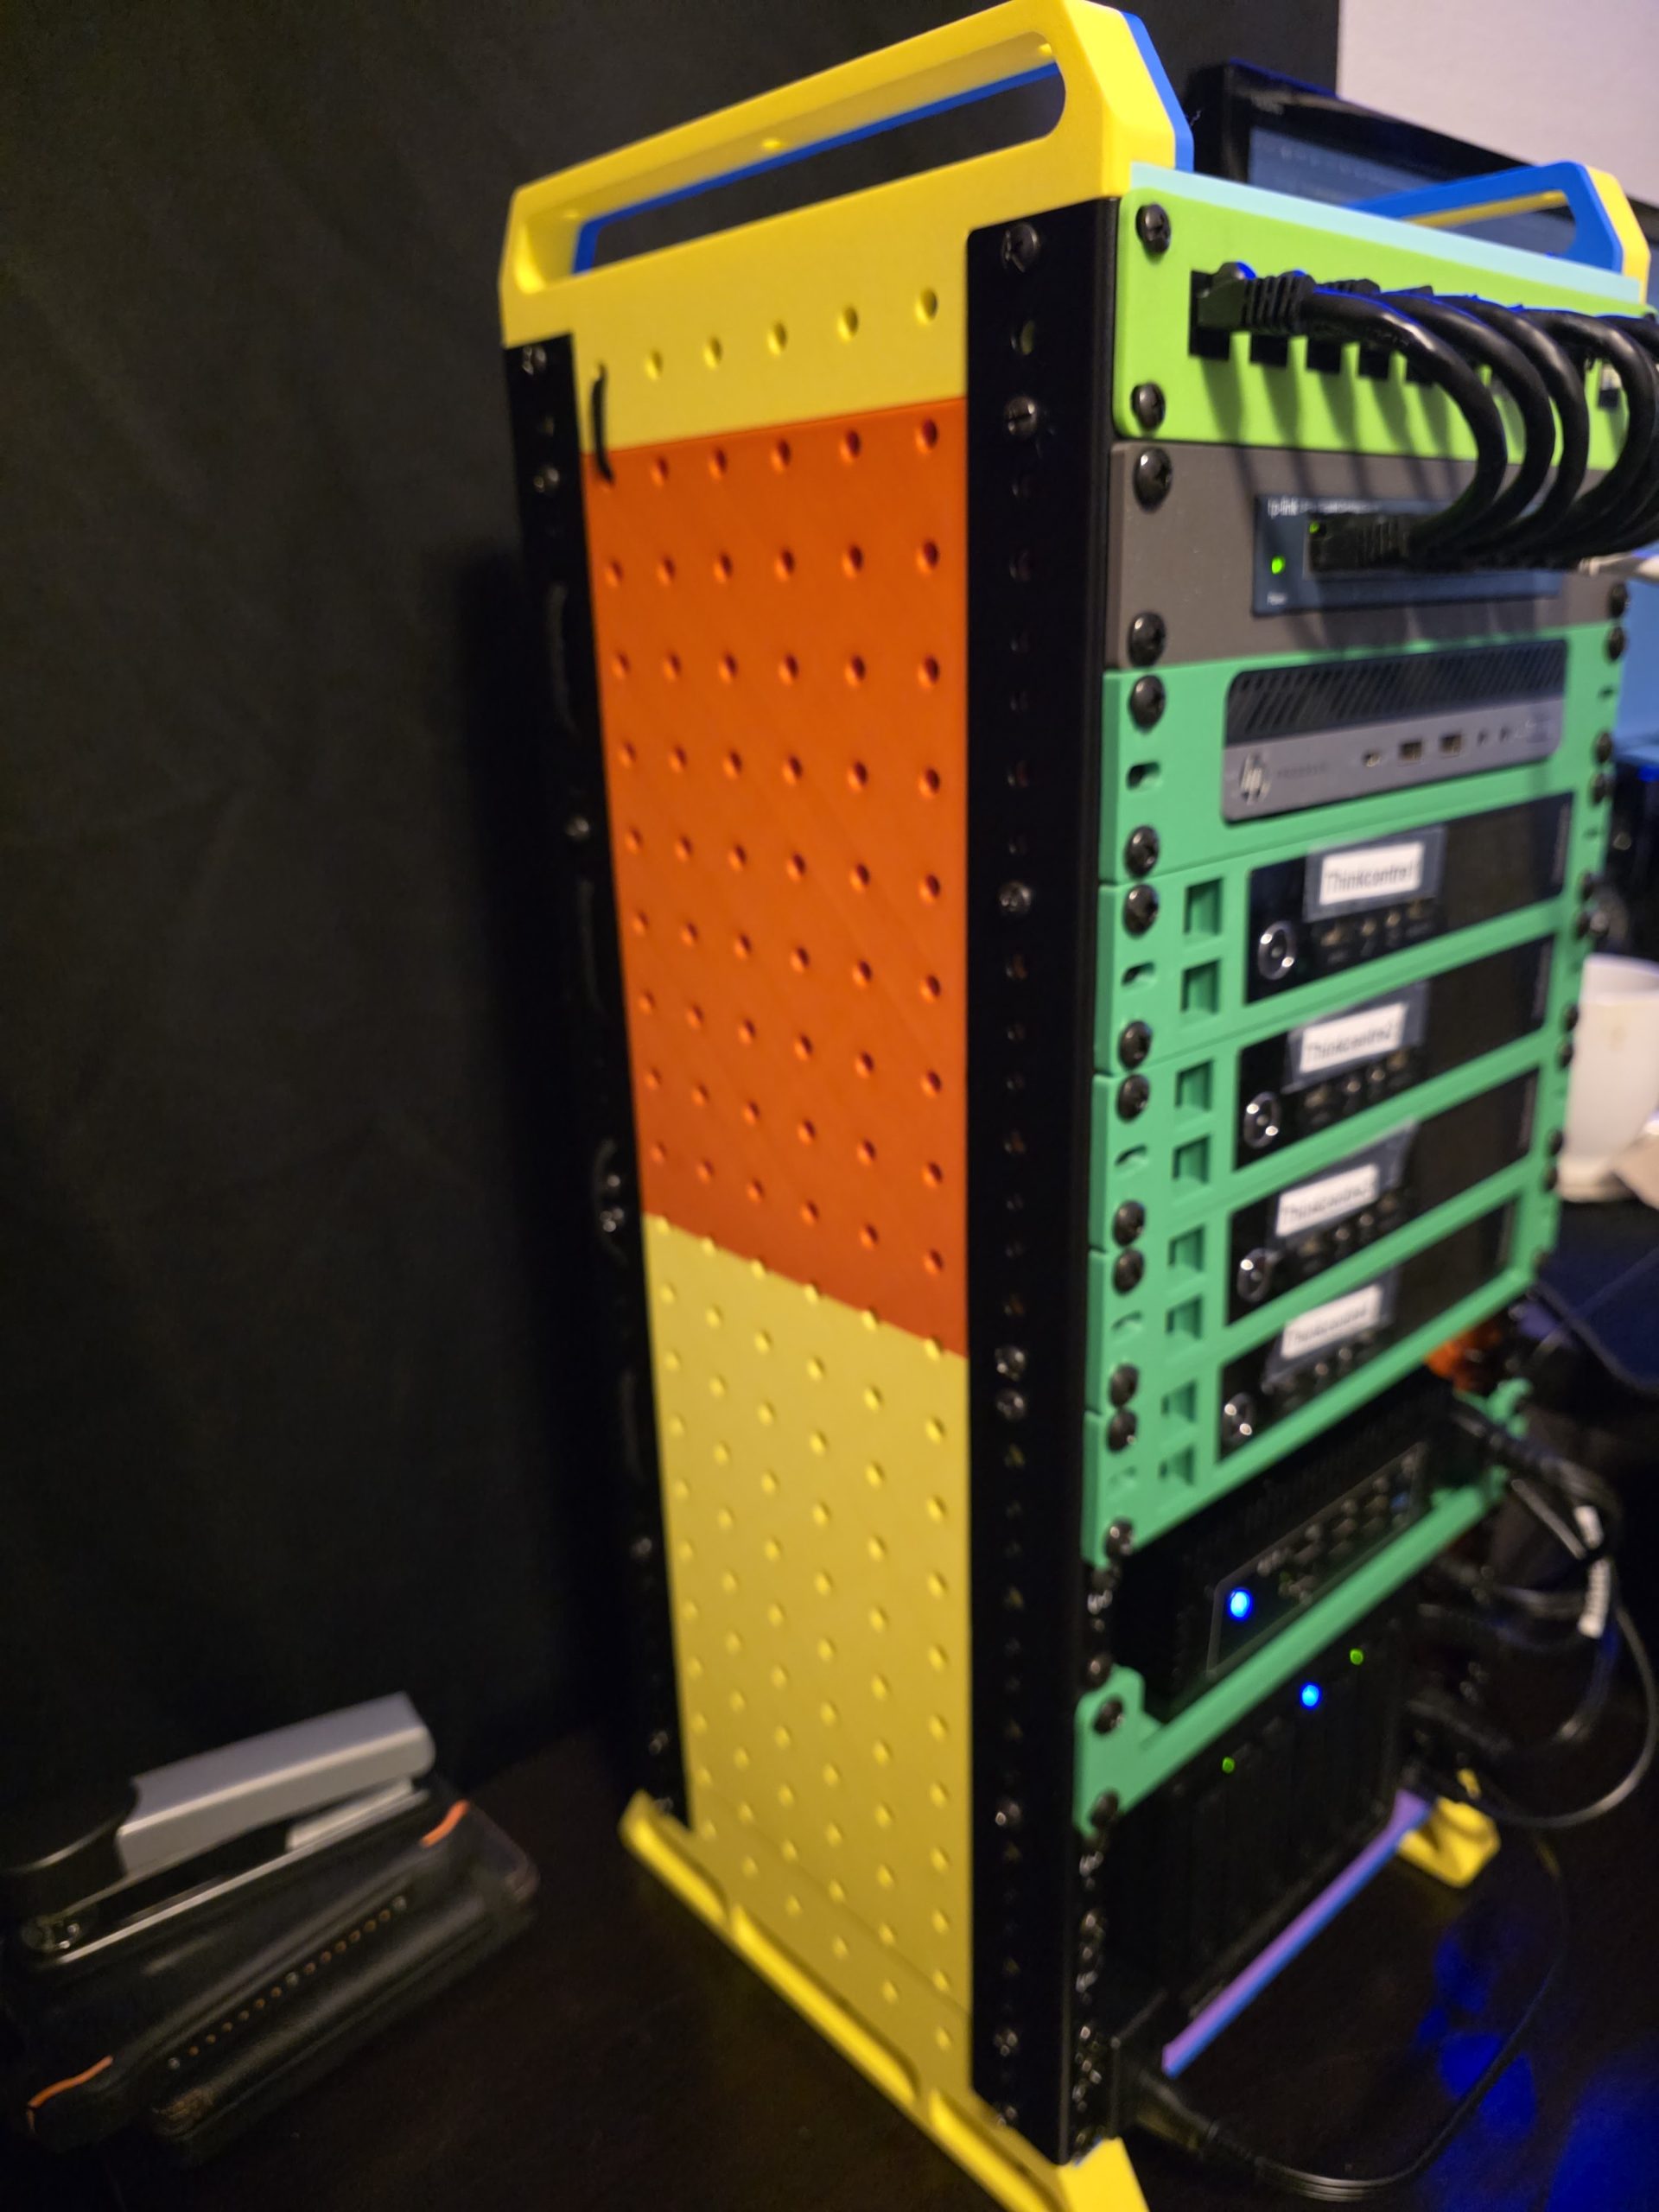
And then I designed the brackets that could make it so I could have my 10-inch rack AND my regular servers together! A simple, 3D printable bracket that can take some 10U rails and mounts right into a standard 19-inch rack tower.
I can now have 50 to 100 devices if I wanted to stack 10 1U devices per 10-inch rack. In a 28U rack, I can stack 5 of my 10-inch racks one on top of the other. Front and back that makes for a lot of mountable space.
The Problem With 10-Inch Racks in a 19-Inch World
If you’ve been in the mini PC homelab space for any amount of time, you’ve probably run into 10-inch rack hardware. It’s perfect for Thinkcentres, N100 boxes, small switches, patch panels — anything in that compact form factor that doesn’t need full server-width real estate. The gear is cheap, the form factor is tidy, and a single 10-inch rack on a shelf looks genuinely good.
The problem is to get those into a regular tower with all the rest of the hardware that’s been standard for decades. Switches, Routers, “Rack mountable” anything is usually a 19in setup. Not very clean or easy to get that tier of equipment in 10in form factor ready to be rack mounted.
When trying to search for a 10in rack designed to be integrated with a 19U server rack, you find almost nothing. One solution I found required milling a custom sheet of aluminum from a company custom ordered. That could take weeks or months depending on the company, and it might not even work.
What you actually need is a bracket that lets a standard 1U rail — rotated so the rail runs side to side inside the 19-inch rack instead of virtically. To my surprise, I already had a couple 10U rails from a previous rack-cabinet project I was working on.
I looked for the bracket to mount it with… It does not exist, at least not anywhere I could find. So I modeled it!
The Bracket
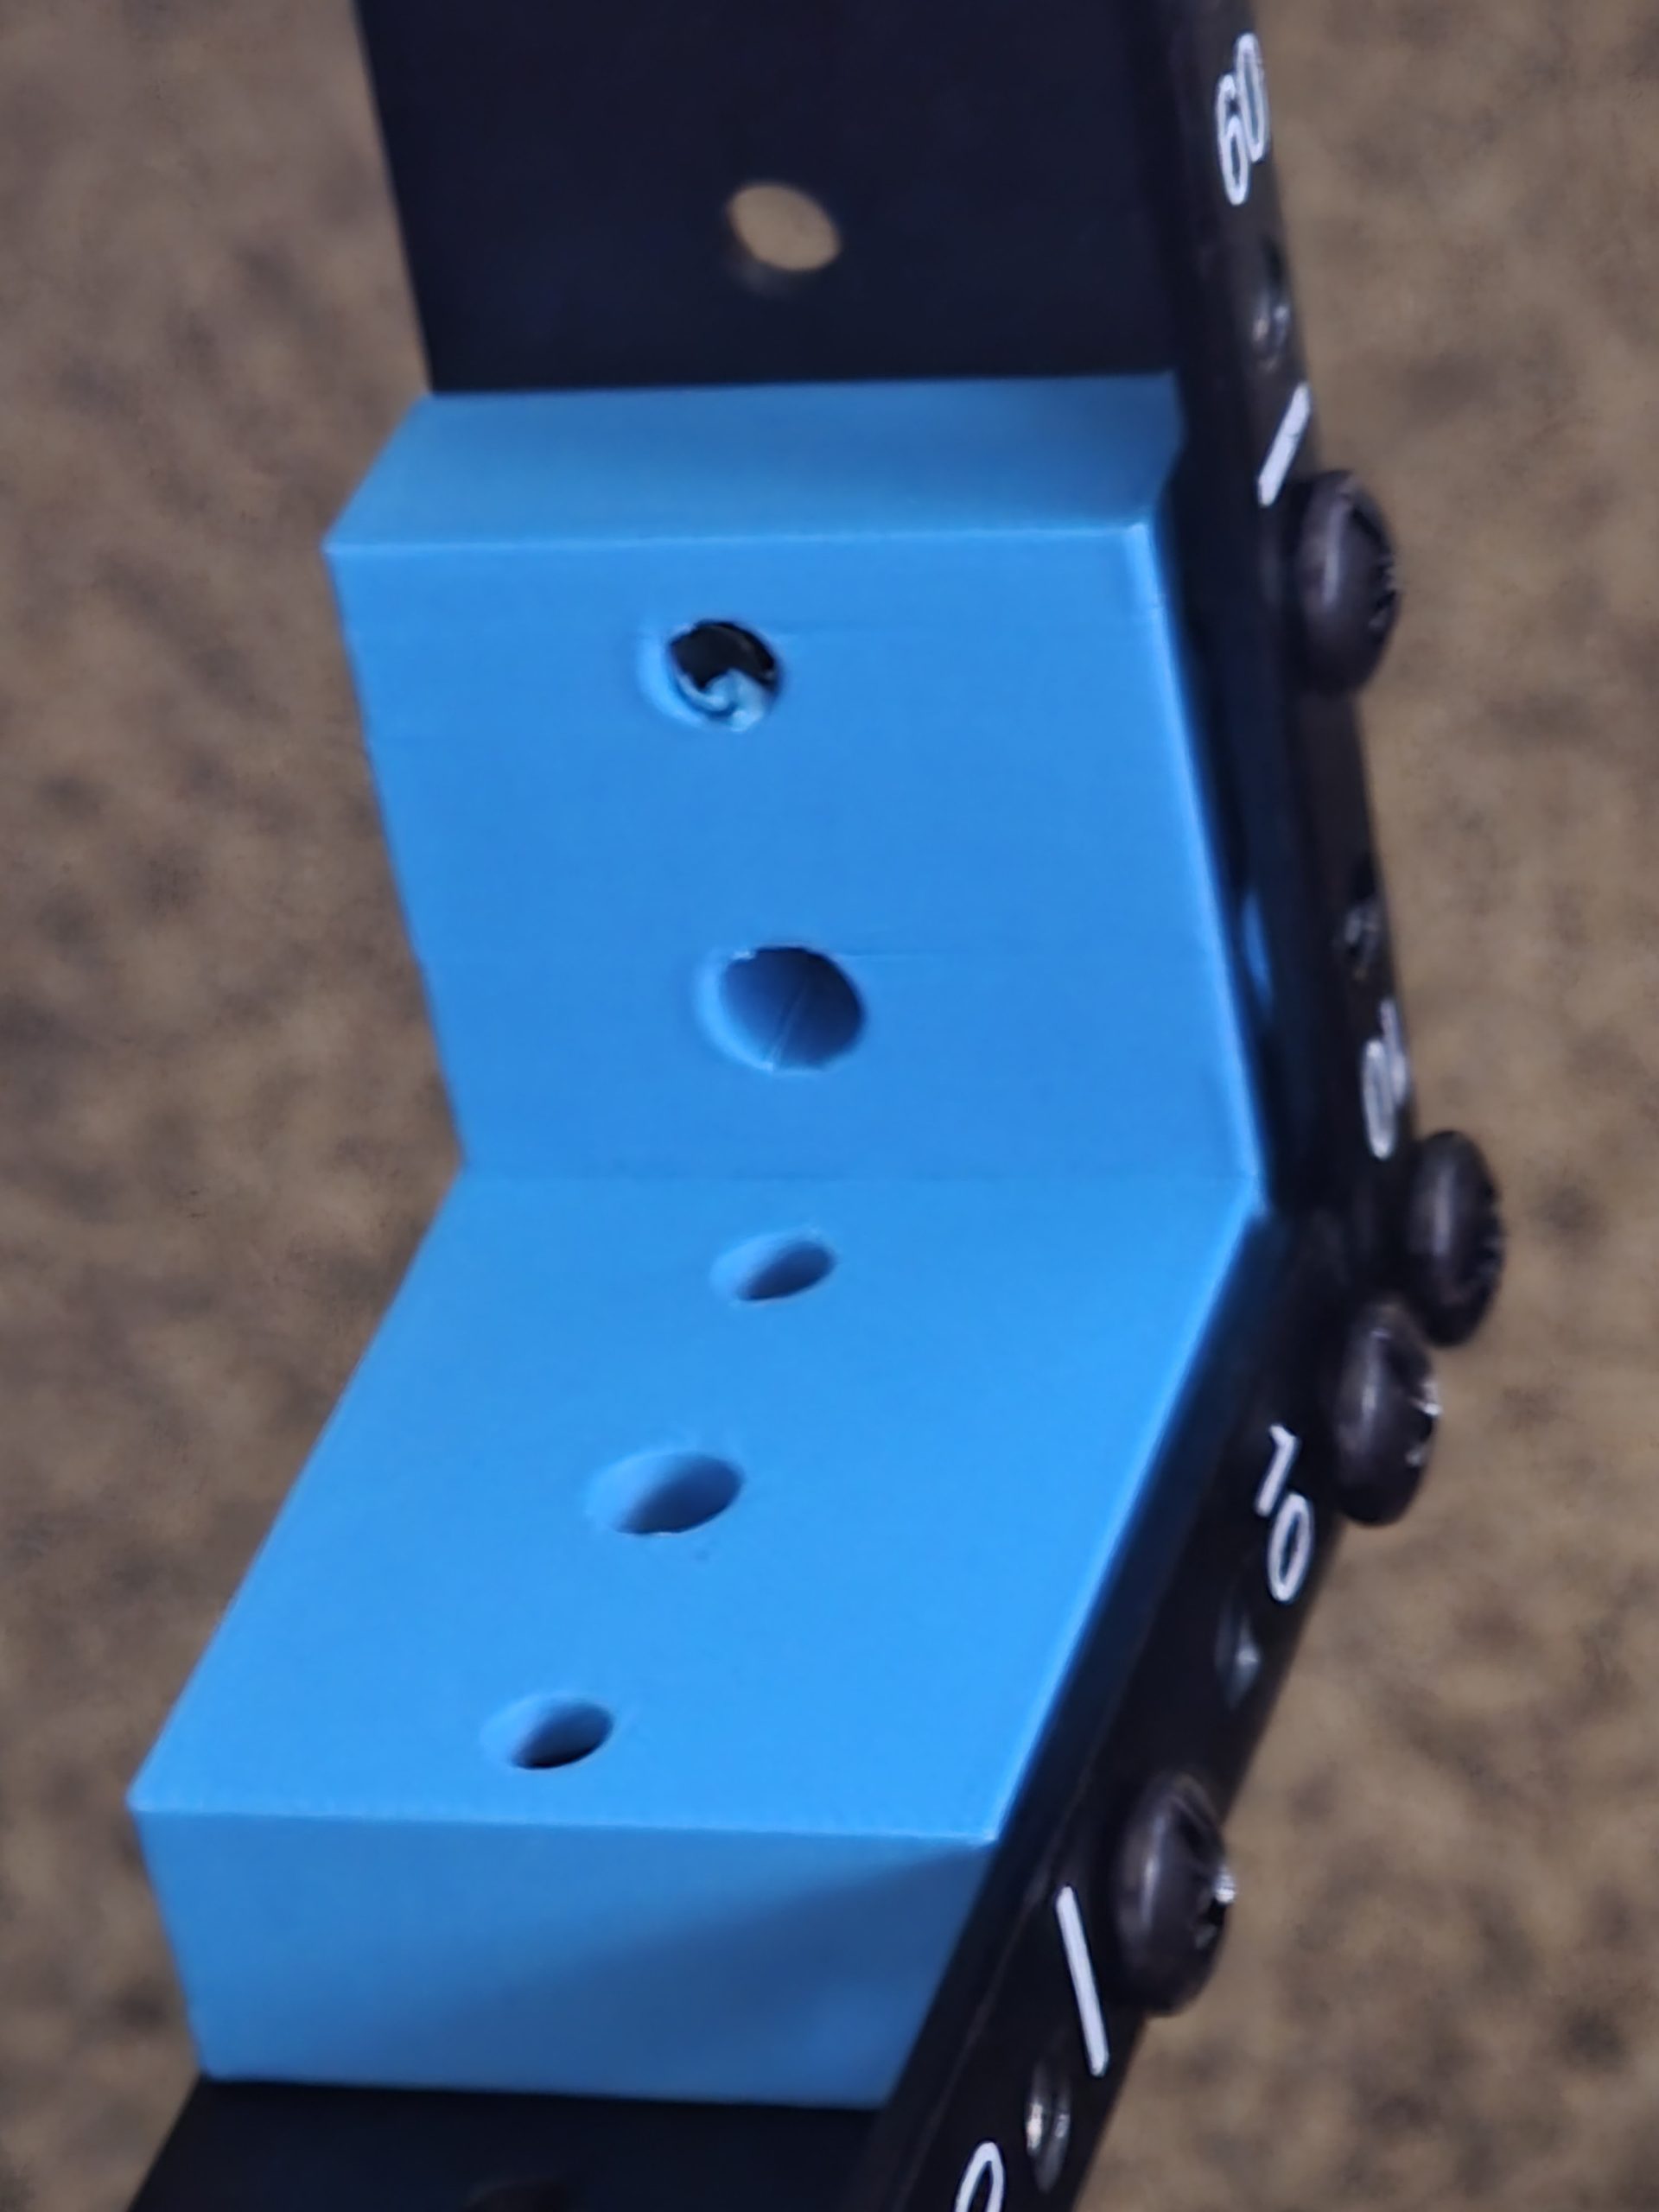
The design is simple enough that I’m almost embarrassed it took me a while to find it. It’s a 1U-to-1U 90-degree adapter — a flat bracket with the standard rack ear hole pattern on one face and the same pattern rotated 90 degrees on the other, so you can bolt a cheap Amazon rail ear to it and have it face the right direction inside the rack.
I modeled it in OnShape using the same approach I used for a previous L-bracket project — start with the standard 19-inch rack hole spacing, rotate 90 degrees, build out enough material to make it rigid. The wall thickness ended up being chunky enough that PLA holds just fine, but I’d recommend PETG if your rack lives anywhere with real heat. Server gear runs warm and sustained heat over time can creep-deform PLA under load. PETG handles it better.
Two brackets per 10-inch rail section. Four brackets per full 10-inch rack installation. Print time is short, filament cost is negligible, and the Amazon rails they’re designed around cost almost nothing compared to purpose-built 10-inch rack enclosures.
The OnShape model is public and linked here: https://cad.onshape.com/documents/5183f0cf772f9134c0bd991a/w/5ded5dd1658c36d42a82beba/e/77f1a2cd11bbce1ec09b1d37
The Rackception Math
Here’s where it gets fun.
A 10-inch rack section — two rails, mounted 90 degrees inside the 19-inch rack — takes up 5.5U of vertical space in the full rack. That 5.5U can hold up to 10 mini PCs on standard 10-inch 1U shelves.
10 devices in 5.5U.
A standard 1U server takes 1U and holds one machine. My setup fits 10 machines in 5.5U — roughly half the physical space as 10 individual 1U servers, except those would require 10U and cost dramatically more in both hardware and power, be louder, hotter… You get it.
In a 28U rack, if you dedicated the entire thing to 10-inch rackception, you could fit five full 10-inch rack sections. Five sections at 10 devices each is 50 mini PCs in a single tower on wheels. That’s a large cluster in something you can roll through a doorway.
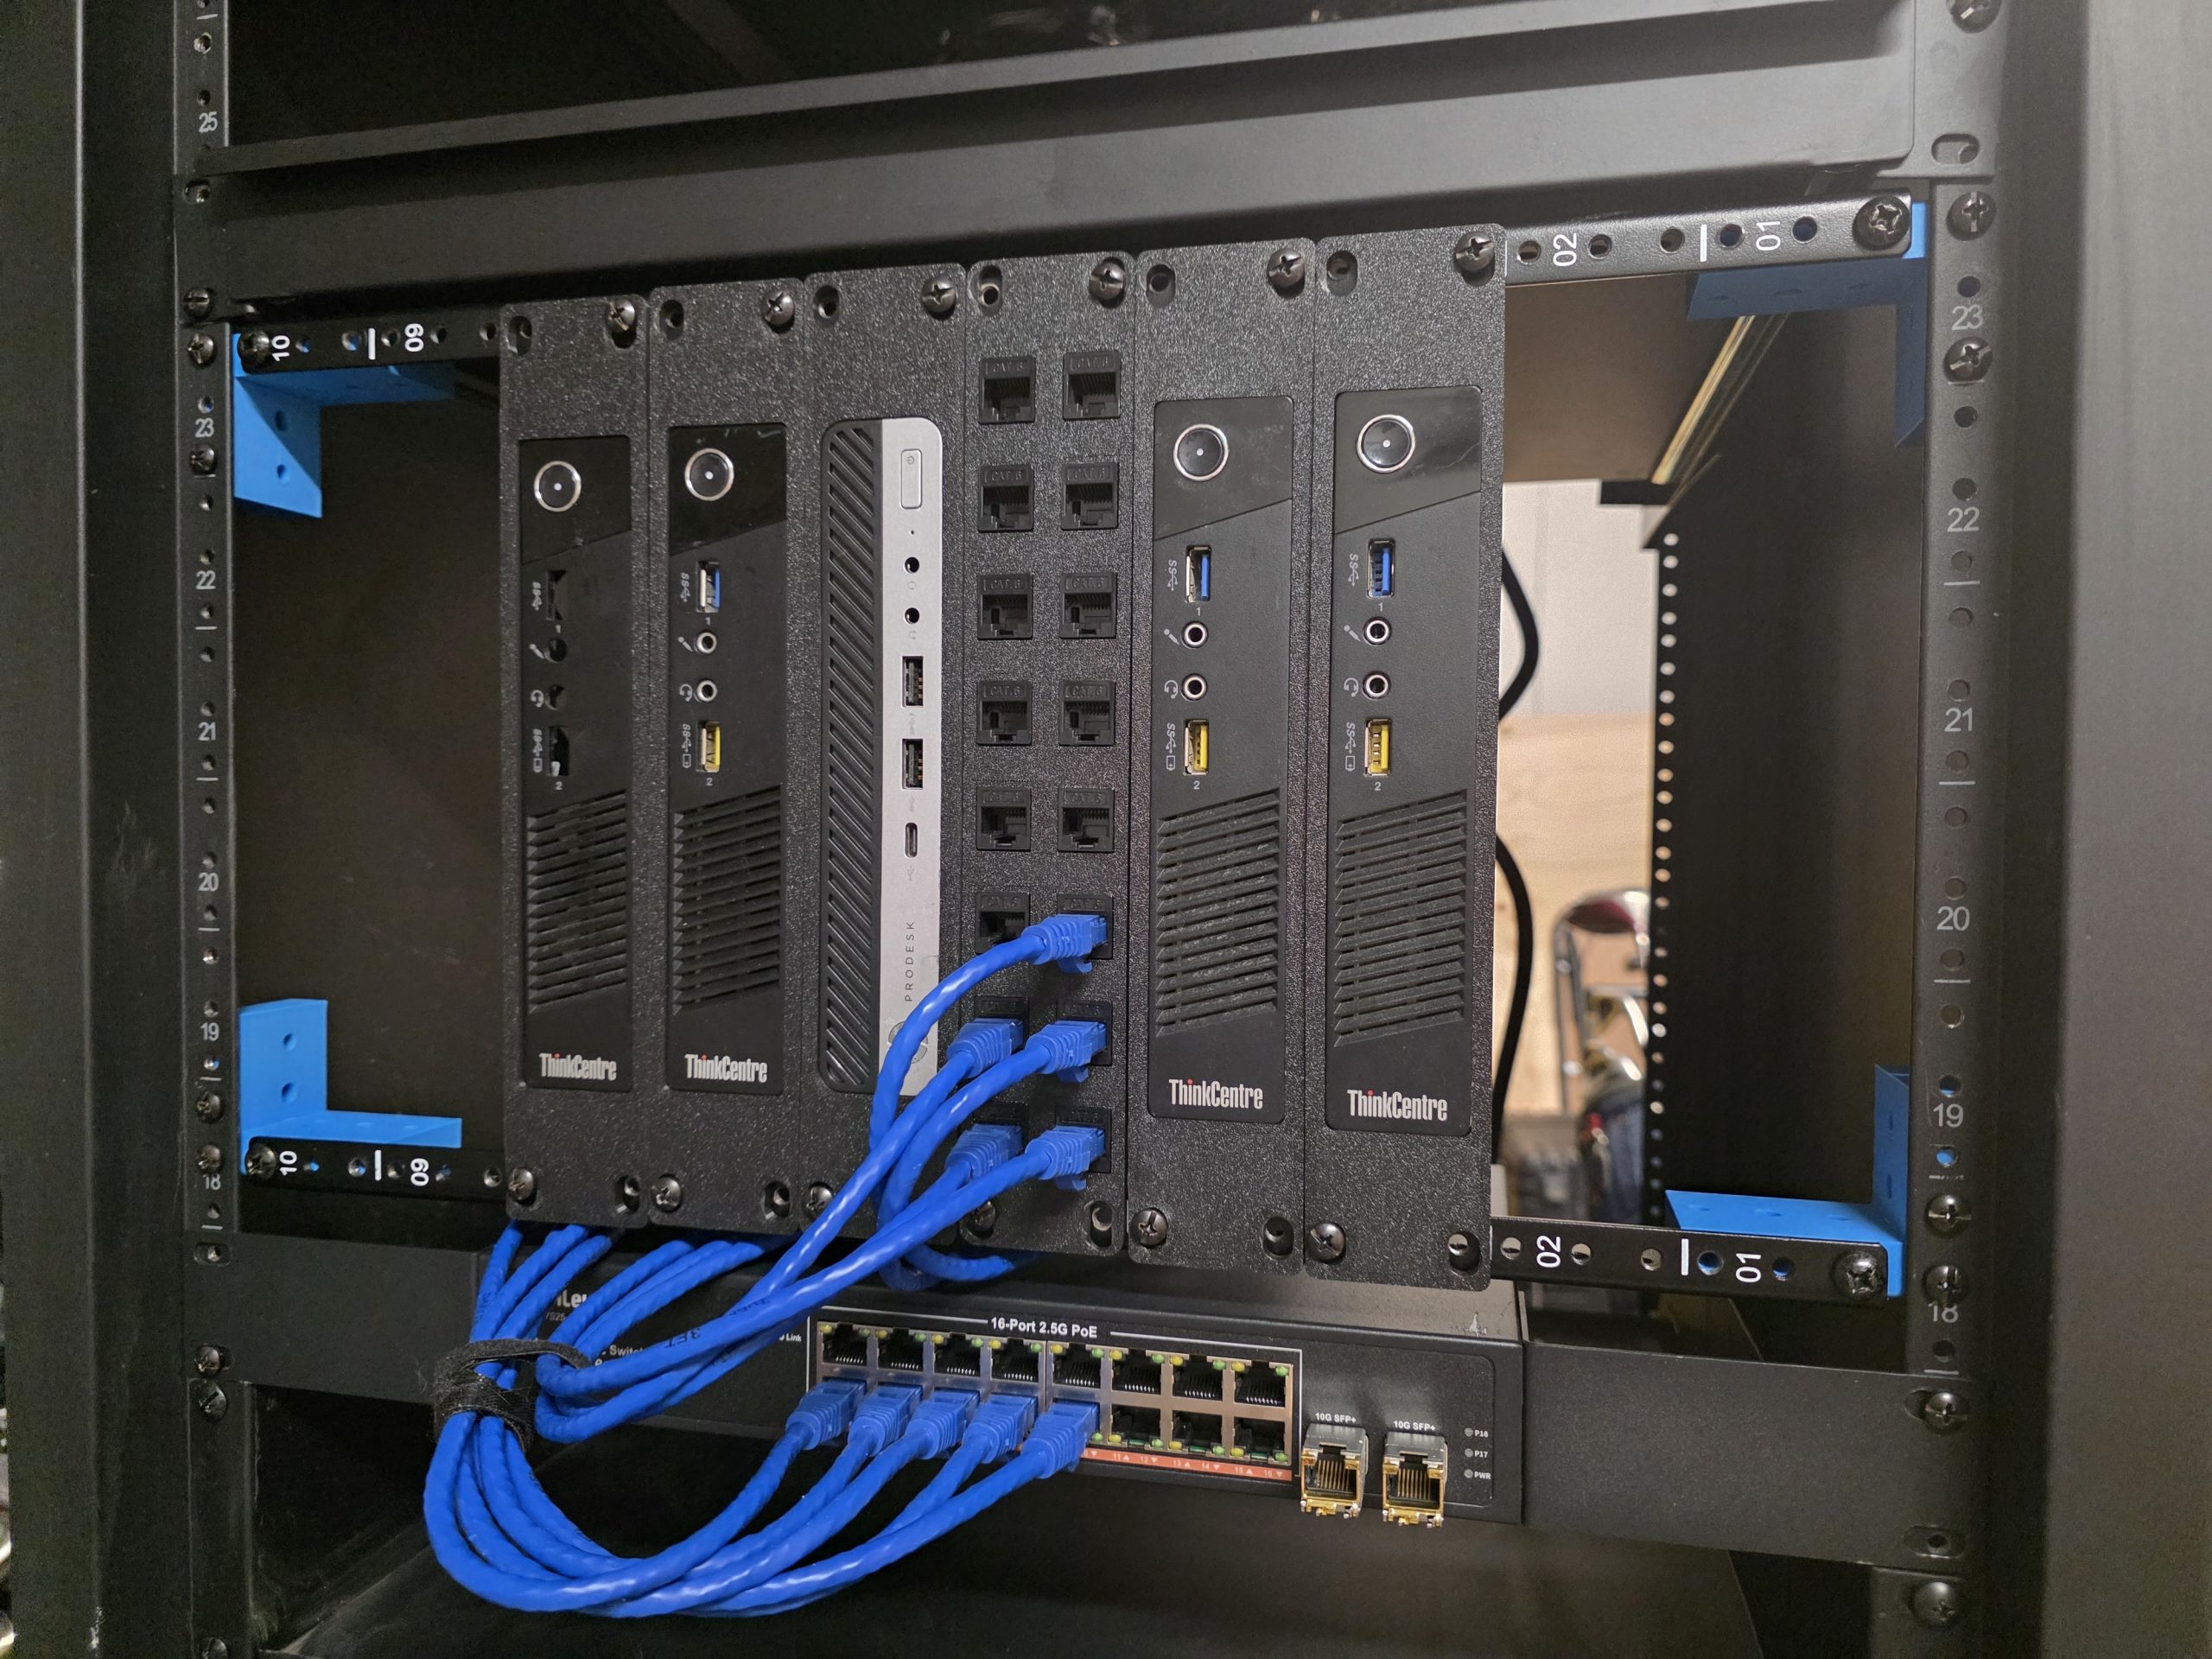
I’m not running 50 machines — yet — but the point is the headroom. Right now I have two 10-inch rack sections installed and populated with five machines: four Thinkcentre mini PCs and an HP mini. Two more sections are mounted and waiting, rails ready, for whatever comes next. The expansion path is already built in.
What’s Actually in the Rack
The 10-inch sections are only part of the story. My use of the 28U fills out into a complete, self-contained lab.
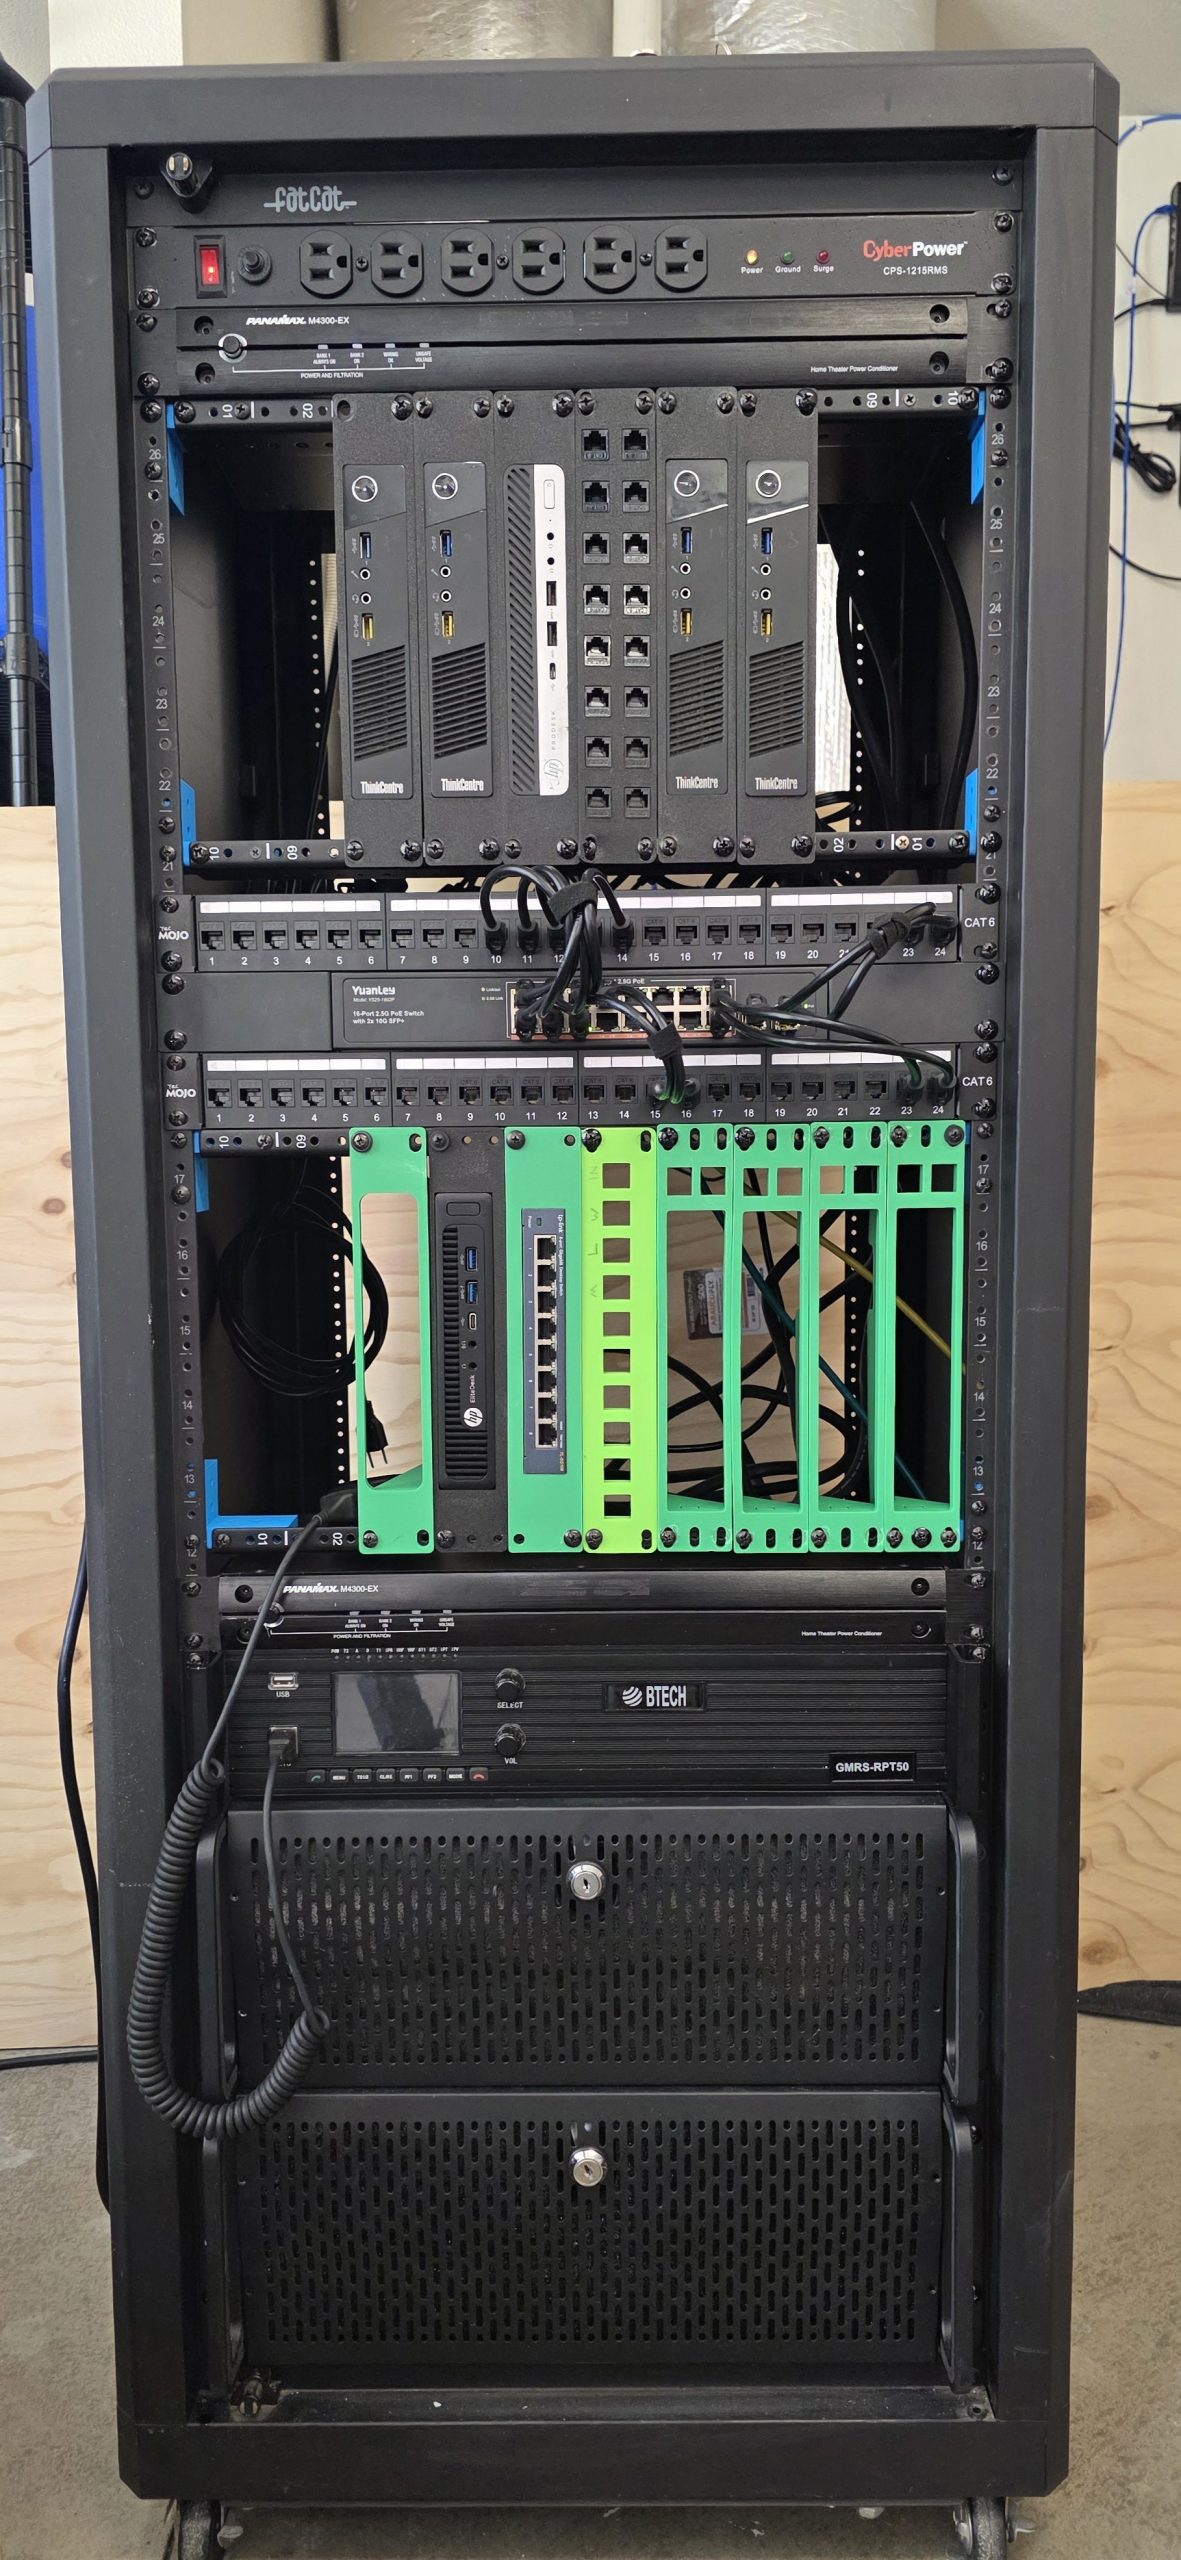
Working from top to bottom, here’s the current layout:
10-inch rack section 1 — four Thinkcentre mini PCs and the HP mini. Five nodes, all running Proxmox, connected back to the patch panel below.
10-inch rack section 2 — empty rails, waiting. This is where the next batch of nodes goes when I pick them up. A half-working HP G2 something or other with no OS installed is being stored there.
1U 24-port 2.5G switch — sits between the two patch panels. Everything in the rack connects here.
Two 24-port patch panels — one above the switch, one below. Clean cable management, labeled runs, the whole thing. This is where the single ethernet cable from the wall terminates and fans out to everything in the rack.
2U GMRS radio repeater — It was rack mountable… so I rack mounted it. It’s not ideal but it’s not like I’m paid for this.
4U TrueNAS box — the NAS that used to live on the floor. It’s in the rack now. This is the whole point.
4U Proxmox server — the primary compute node that also used to live on the floor. Also in the rack now. Also the whole point.
2x 1U UPS units — power protection for the whole stack. Running in tandem so if one fails the other picks up.
1U surge protector strip — everything in the rack plugs into this. The strip plugs into one wall outlet.
That’s the whole lab. One outlet. One ethernet cable. And technically one coax. On wheels. It’s more portable than my actual gaming PC.
One Outlet, One Cable, On Wheels
The single-connection goal was the design constraint I built around from the start. A homelab that requires you to crawl behind it and disconnect eight separate cables every time you want to move it isn’t really portable — it’s just a cluster you happen to be able to lift eventually.
This rack rolls. You unplug one power cable and one ethernet, and it moves. That’s it. I can relocate the entire lab — all the compute, storage, networking, and power protection — in about thirty seconds.
For a home setup that might need to move for renovations, live in different rooms at different times, or eventually go somewhere else entirely, that portability matters. And frankly it just looks better. The floor servers are gone. The desk is cleaner. The den has a rack in it, and the wife doesn’t completely hate the look of it!
What I’d Do Differently
A couple of notes for anyone building something similar:
Cable management is easier before the rack is full. I did some of mine after the fact and I paid for it in patience. Run your patch panel cables before you mount the compute nodes above them.
Label everything during the build. Patch panel port 1 goes to which machine? You know right now. You will not know in six months. Label it now.
Print extras. I printed exactly the number of brackets I needed and then immediately wanted to add another 10-inch section. Print a spare set while you have the filament loaded.
PETG over PLA if you can. The brackets near the compute nodes run noticeably warmer than the ones near the patch panels. PLA is probably fine for most setups but PETG costs the same and lasts longer under heat.
Parts and Files
The bracket model: OnShape — 90-degree 1U rack adapter (public, free to use and remix)
Print profile (Bambu Lab): MakerWorld — 19-inch to 10-inch server rack bracket — if you’re on a Bambu printer, the profile is ready to go. Download, slice, print.
10-inch rack rails (Amazon): Search “10 inch rack rail 1U” — the cheap ones work fine with the brackets. Look for the ones with standard hole spacing and you’re good. The ones I used are discontinued.
Filament: Any PETG works. I used whatever was loaded at the time. Wall thickness on the bracket makes material choice less critical than it would be for something thinner.
The rack itself: 28U open-frame rack with wheels. Plenty of options on Amazon in the $150–200 range. Open-frame works better for airflow with mini PCs than enclosed.
Mini PC rails: Standard 10-inch 1U shelves or rails depending on your hardware. Thinkcentres sit on shelves. Some smaller form factors can use actual rails if they have ear mounts.
If you end up printing the bracket and building something with it, I’d genuinely like to see it. Drop a comment or reach out — the whole point of putting this out there is so someone else doesn’t spend three hours looking for a part that doesn’t exist when they could just print it in two.
This post is part of the DabbleDen homelab series. Previous posts cover the NAS build, the Proxmox cluster setup, and the ham radio power bus. Be sure to check them out!
Leave a Reply